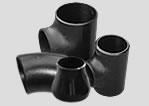
Four quality inspection aspects of pipe fitting elbow
1, appearance check: generally observe with the naked eye, sometimes observe with 5-20 times magnifying glass. Surface defects can be found through weld inspection.
2. NDT: detect defects such as slag, blowholes and cracks hidden inside the weld. At present, the most commonly used are X ray inspection, ultrasonic testing and magnetic flaw detection. X ray inspection is the use of X ray for weld photography, according to the film image to determine whether there are defects, defects and types.
3, hydraulic test and pressure test: for pressurized containers requiring sealing, pressure tests and air pressure tests should be carried out to check the sealing and pressure capacity of the weld.
4. Mechanical performance test of elbow: nondestructive flaw detection can detect inherent defects of weld, but it can not explain the mechanical properties of metal in weld heat affected zone.
previous page:Use of oil casing
next pageThe characteristics of the pipe fitting tee link


